Step 1: Download and Install XAMPP
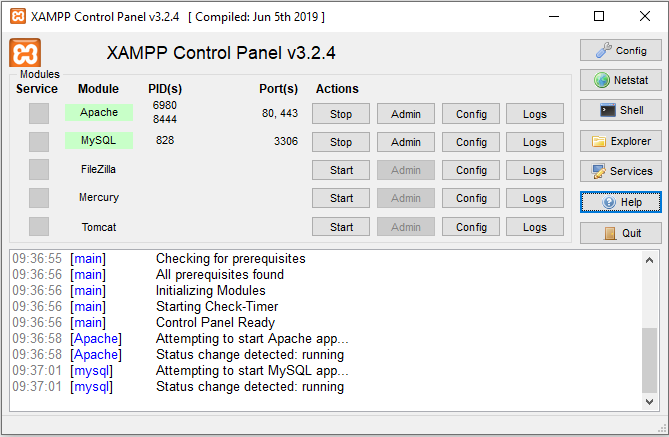
Once XAMPP runs on your system, you will have the XAMPP control panel visible on your screen. Click the
Start button beside
Apache &
MySQL.
The background color of the names should change to light green.

Step 2: Create a Localhost Database
Click on the
Admin option beside
MySQL on the XAMPP control panel. It’ll lead you to the phpMyAdmin databases dashboard.
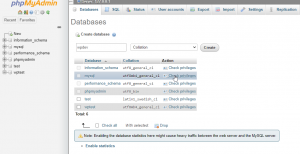
Select
New from the left sidebar and input your precise database name, and select
Collation type. Clicking on the
Create button will create a localhost database.
Step 3: Download the Latest Version of WordPress
Unzip the folder with WordPress files in it. Extract the file, and there will be a folder containing the core WordPress files. Rename the folder as your database name (
wpdev). Use the same name for both database and WordPress folder. It’s required to sync the database and files.
In the XAMPP control panel, navigate to
Explorer > htdocs. Paste the renamed WordPress file (
wpdev) inside the
htdocs folder.
Step 4: Install WordPress and Create a Localhost Website
Open your web browser. On the address bar, type
localhost/wpdev, and click to enter. Here
wpdev is the server name.
The WordPress installation panel should appear.
Select your preferred language and click
Continue to proceed.
In the next window, you have to choose the database you want to use with your WordPress localhost website. Fill in the fields like so:
- Database Name: wpdev (the database we created above)
- Username: root
- Password: (keep this field empty)
Click Submit
On the next page, input your Site Title, choose Username, Password and provide an email address. Then click the Install WordPress button. In a few seconds, you will have WordPress installed on your windows locally.
 Select New from the left sidebar and input your precise database name, and select Collation type. Clicking on the Create button will create a localhost database.